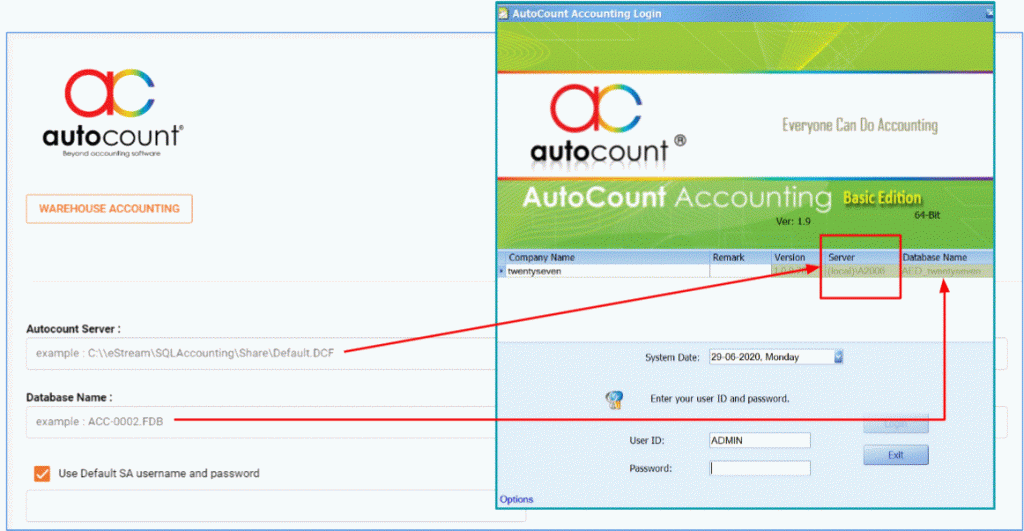
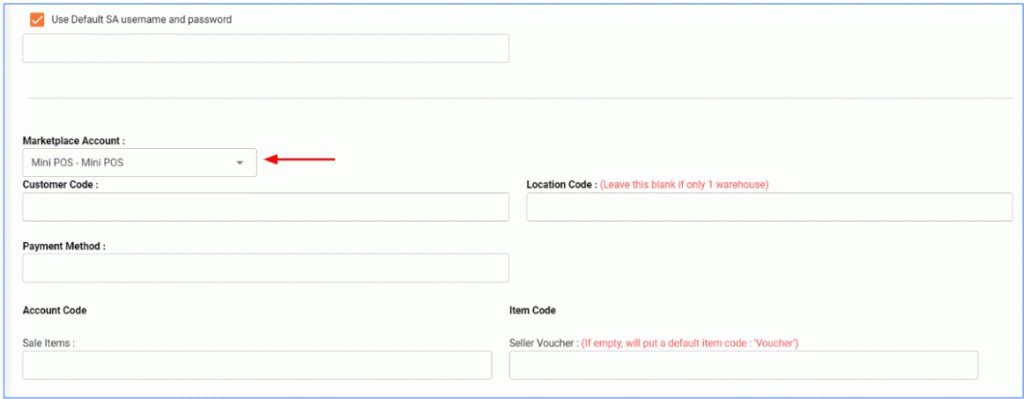
Fill up AUTOCOUNT SERVER and DATABASE NAME *** Please follow the UPPERCASE or lowercase stated in Autocount ***
Step 3:
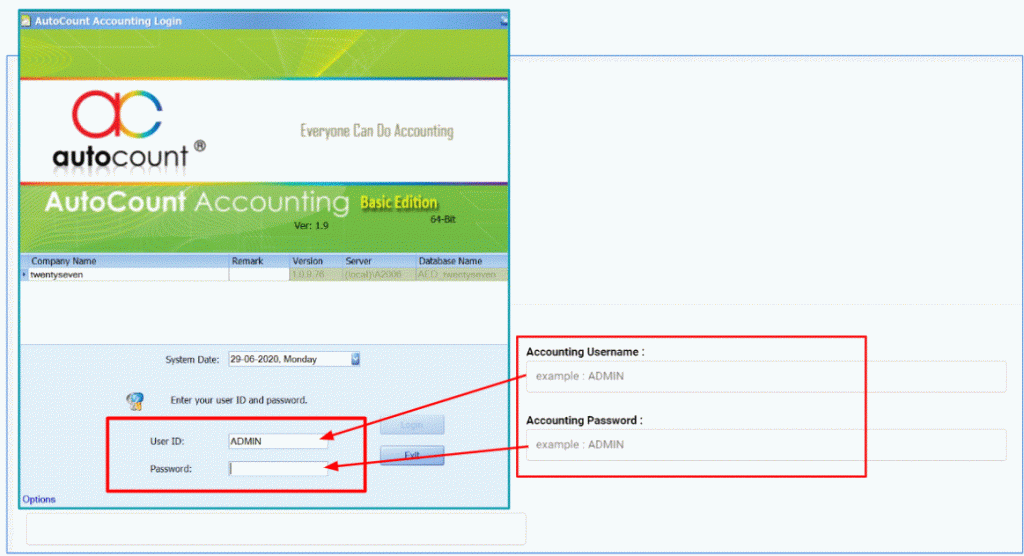
Fill up AUTOCOUNT USER ID and PASSWORD
Step 4:
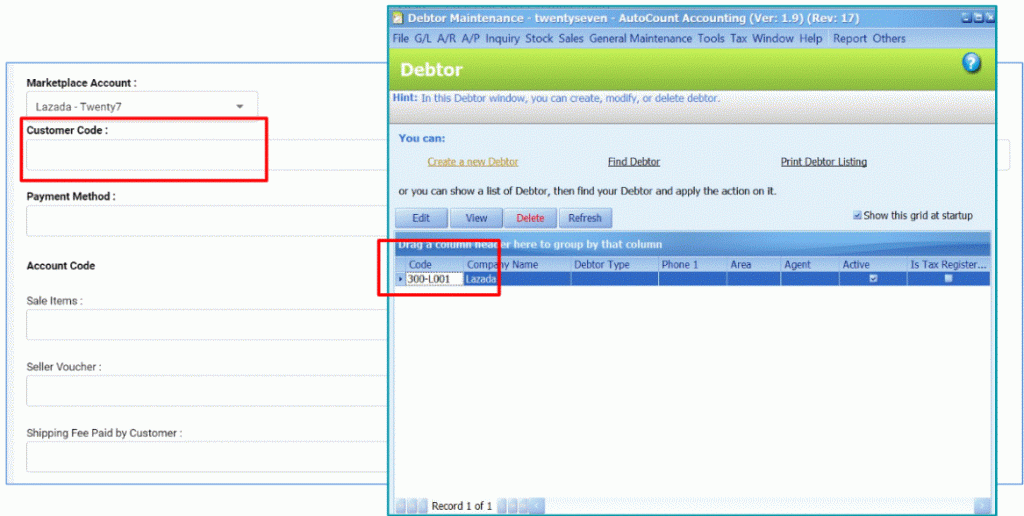
Fill up the CUSTOMER CODE for the selected Marketplace Account
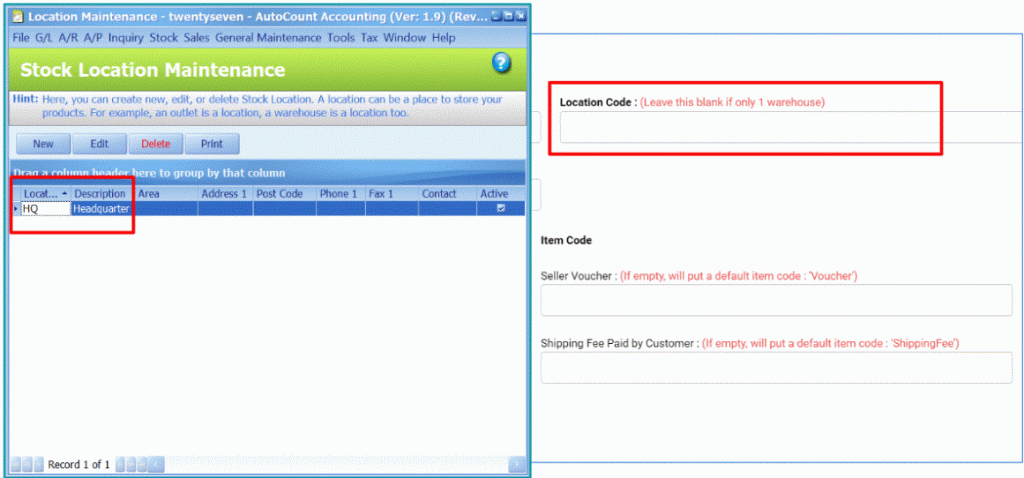
Step 5:
Fill up the STOCK LOCATION CODE for the selected Marketplace Account. Autocount default location code is HQ. If you do not have a specific location setting, just fill in HQ
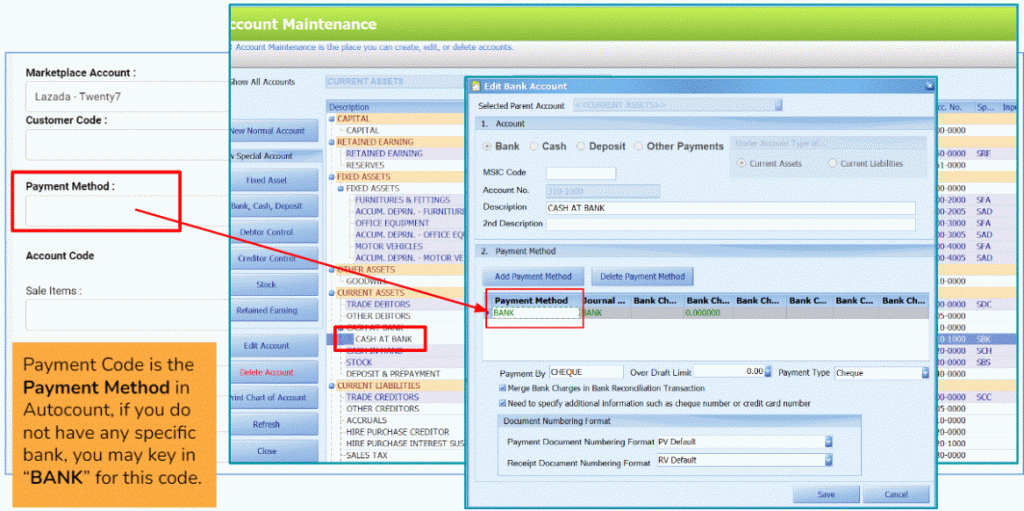
Step 6:
Fill in PAYMENT METHOD for the selected Marketplace Account
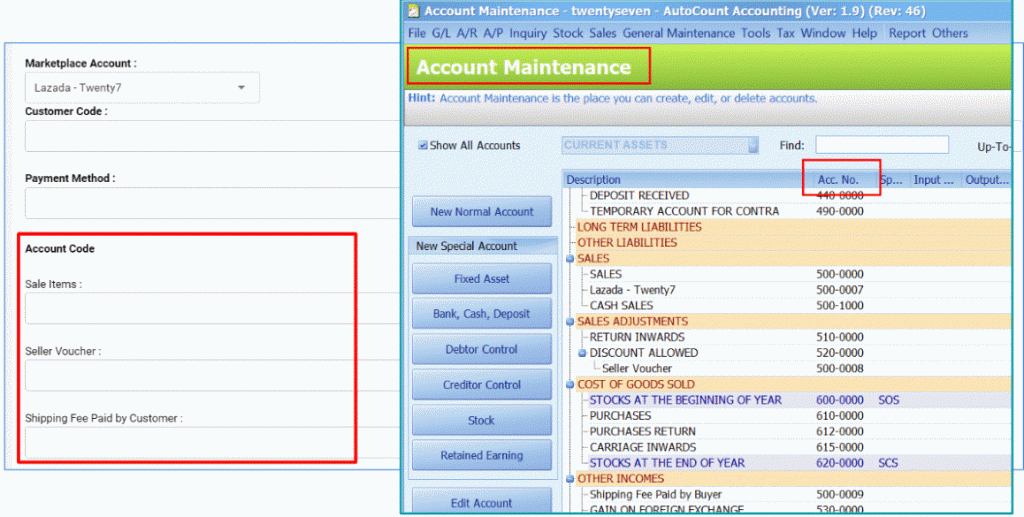
Step 7:
Fill in the ACCOUNT CODE of the SALE ITEMS, SELLER VOUCHER and SHIPPING FEDD PAID BY CUSTOMER for the selected Marketplace Account
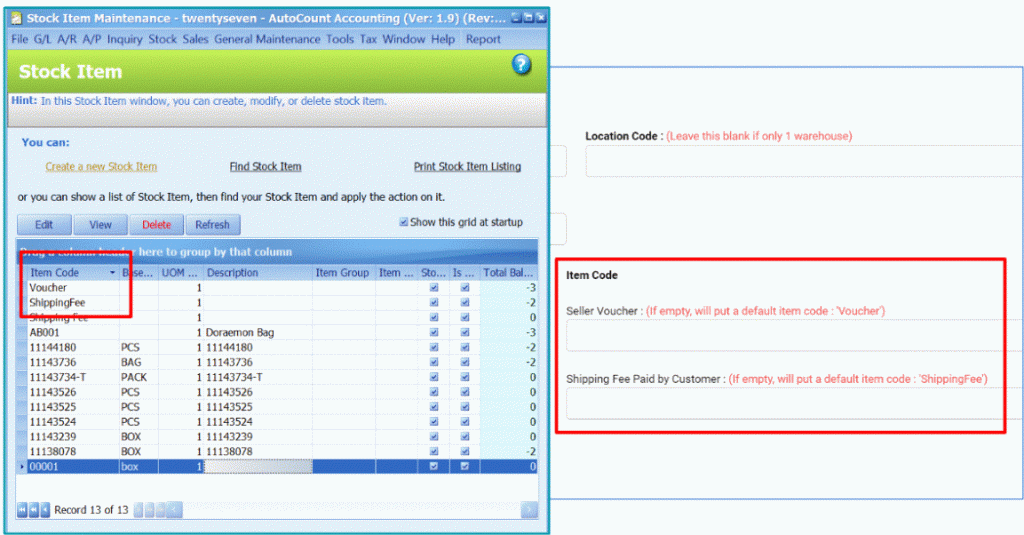
Step 8:
Fill up the ITEM CODE of SELLER VOUCHER and SHIPPING FEE PAID BY CUSTOMER for the selected Marketplace Account
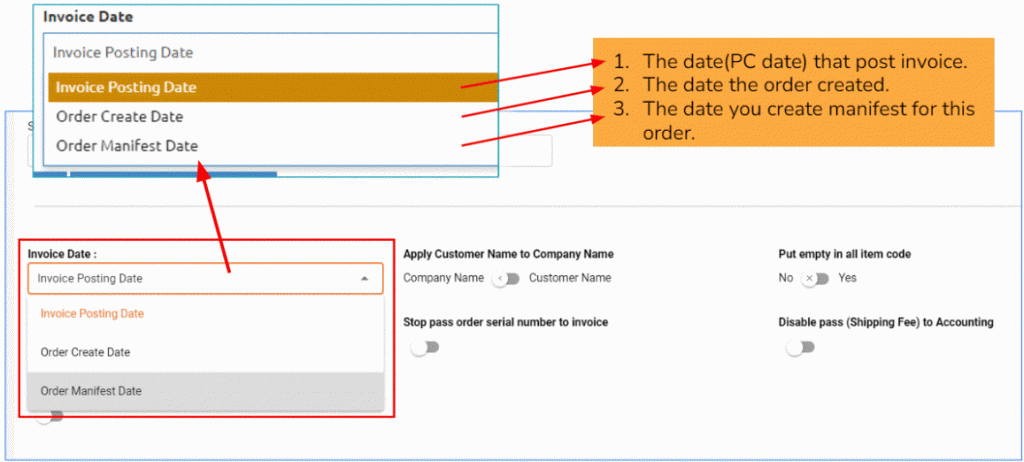
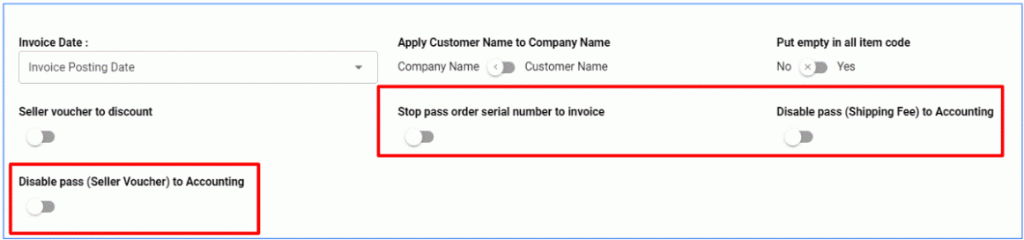
Step 9:
Select a DATE you want to show in the Invoice
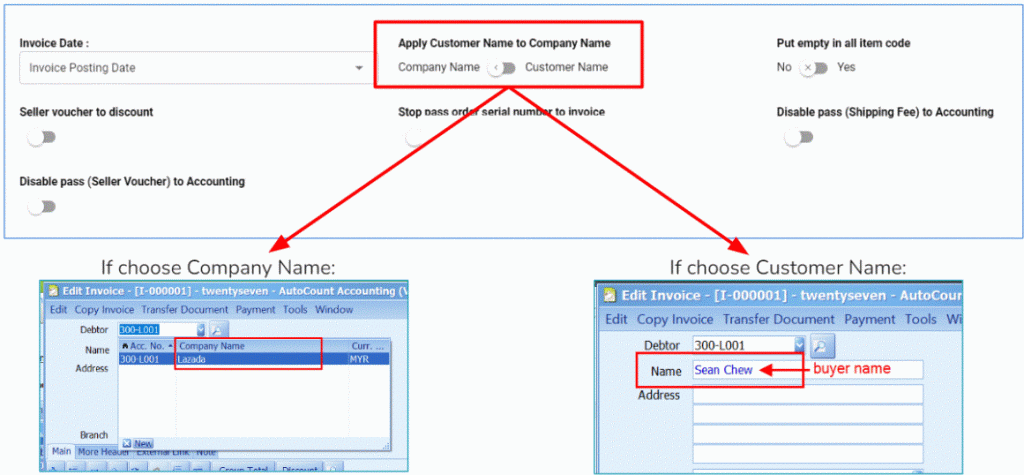
Step 10:
Select the NAME you want to show in the Invoice
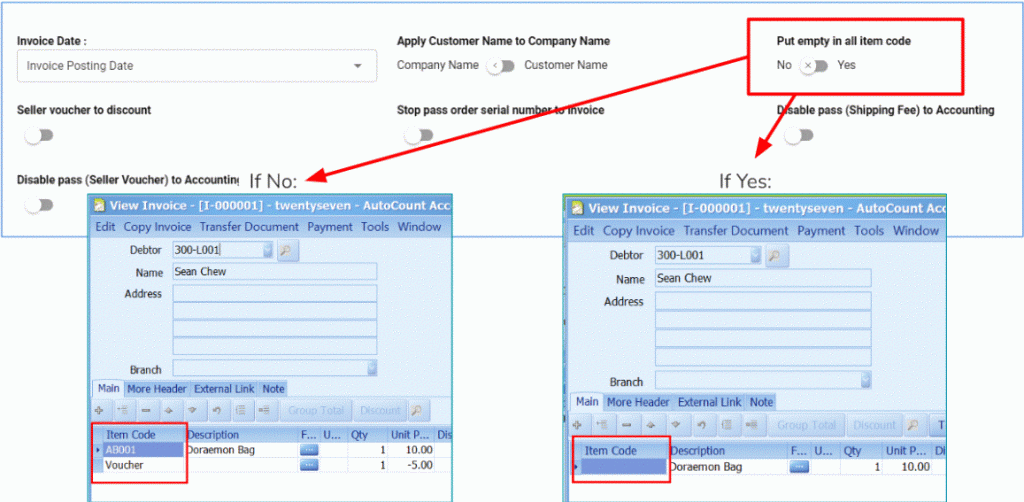
Step 11:
Select YES if you want to place itemcode in Invoice. Select NO if you don’t want to place itemcode in Invoice
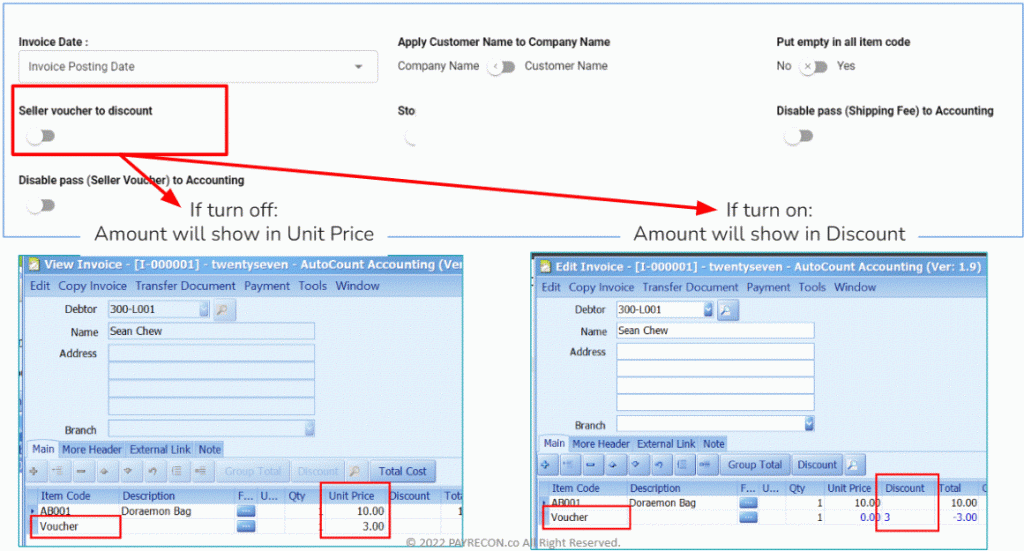
Step 12:
Select the setting you want to place the discount amount in which column in Autocount
Step 13:
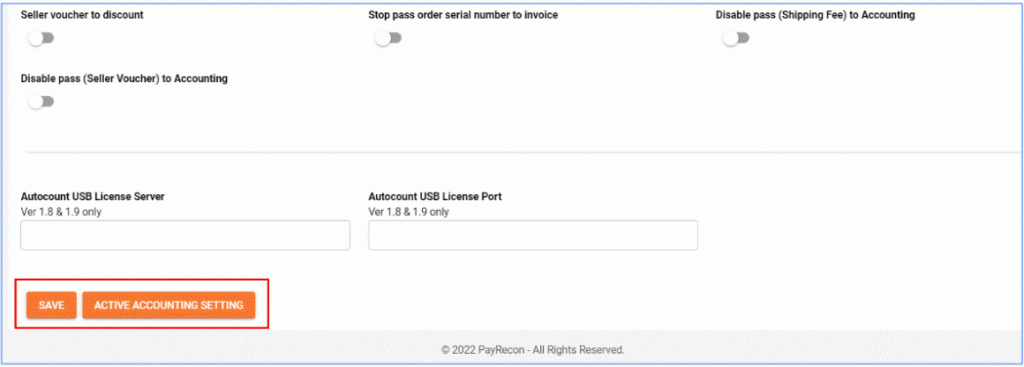
You may turn on these settings if you don’t want to pass the serial number, shipping fee and seller voucher to Autocount
Step 14:
These 2 settings are for users who are using USB to login their Autocount, please contact support for the tutorial
Step 15:
Click “ACTIVE ACCOUNTING SETTING” when done, or click SAVE to update the setting
Step 16:
Next, select another store and set up for the next marketplace account