How to Create Membership Levels
Step 1:
Before initiating membership benefits, follow these essential steps. Begin by accessing your “Setting,” then navigate to “User Setting,” and further into “System Setting.”

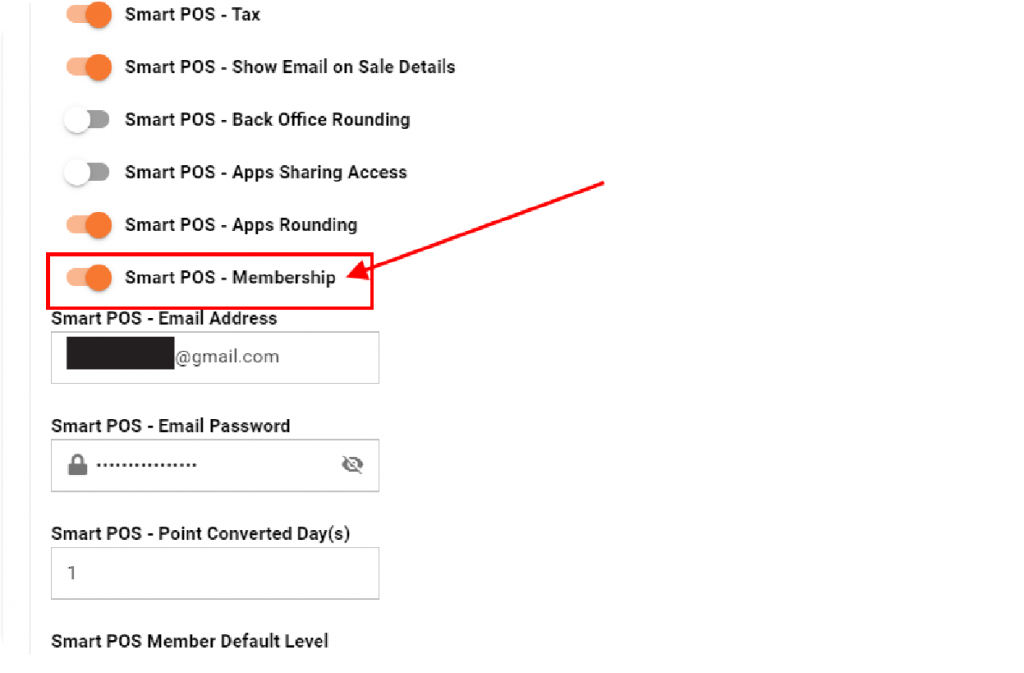
Step 2:
Within the “System Setting,” locate the “Smartpos” section. Here, activate the “Smart Pos – Membership” button. This enables your customers to seamlessly access and enjoy the membership reward feature.
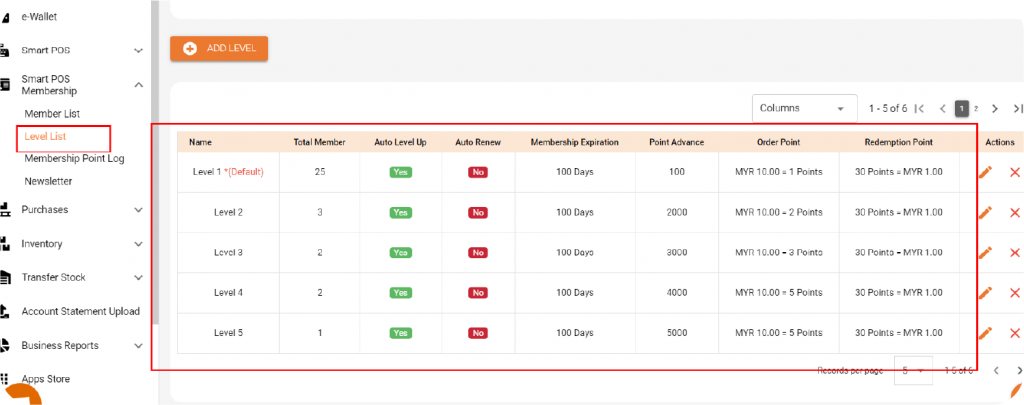
Step 3:
With the membership feature activated, proceed to create tiers for your customers by following these steps. To design membership rewards, head to Smartpos Membership > Level List. Here, you can craft one or more tier lists. Begin by clicking the “Add Level” button.
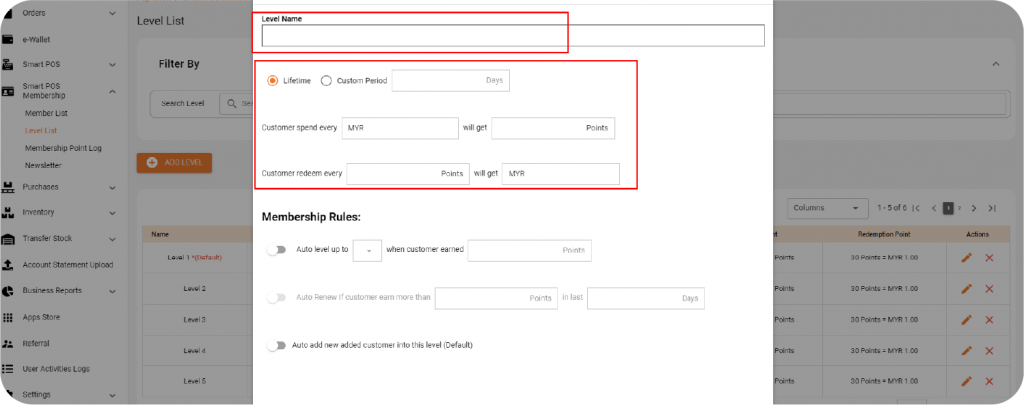
Step 4:
Provide the essential information and confirm. If you need the membership to be expired in certain period, please select the custom period.
The membeship rules such as auto renew will follow the custom period that you set.
If you wish your new customer to join the level immediately after registered, turn on the auto add new added customer into this level (Default) button.
Step 5:
To assign tiers to customers, proceed to “Member List” within Smartpos Membership.
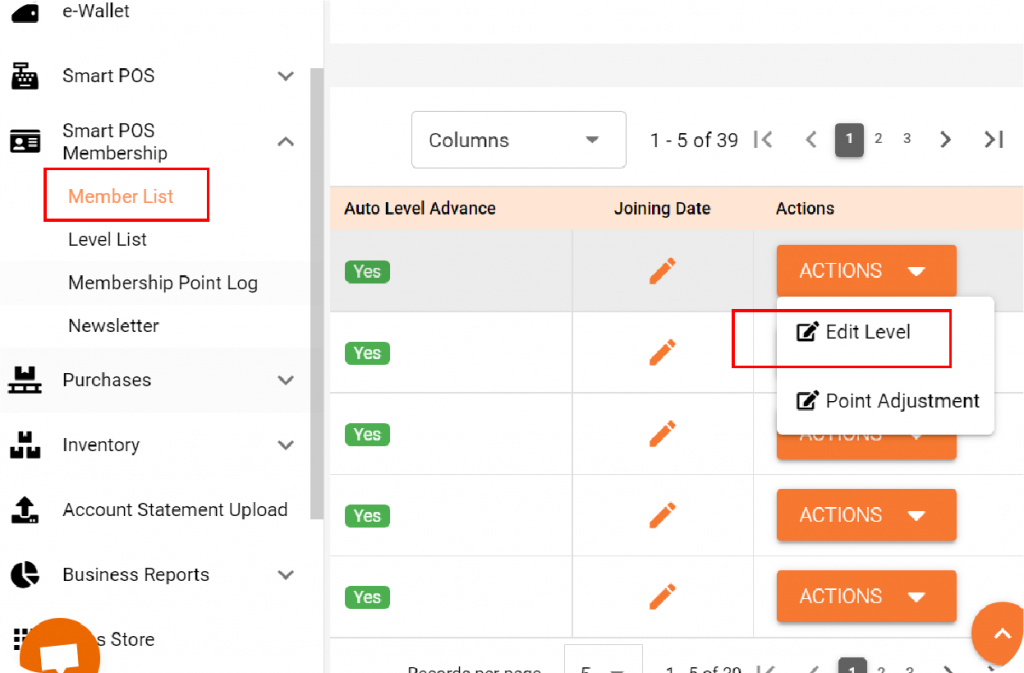
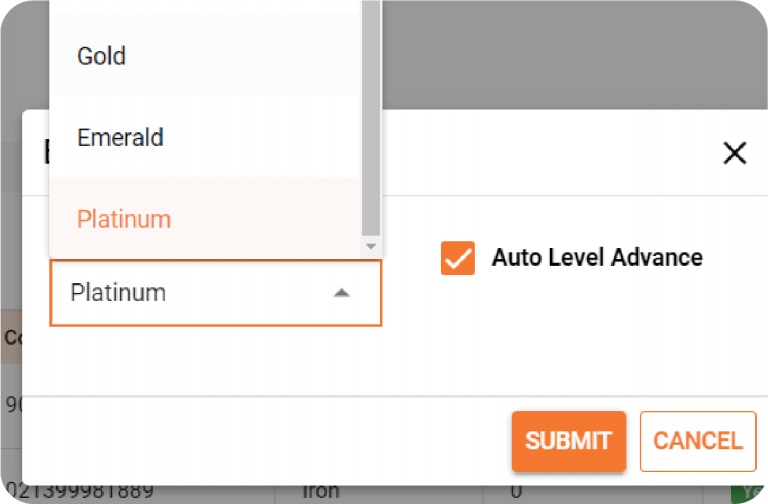
Step 6:
Choose a tier for the customer and confirm the selection.
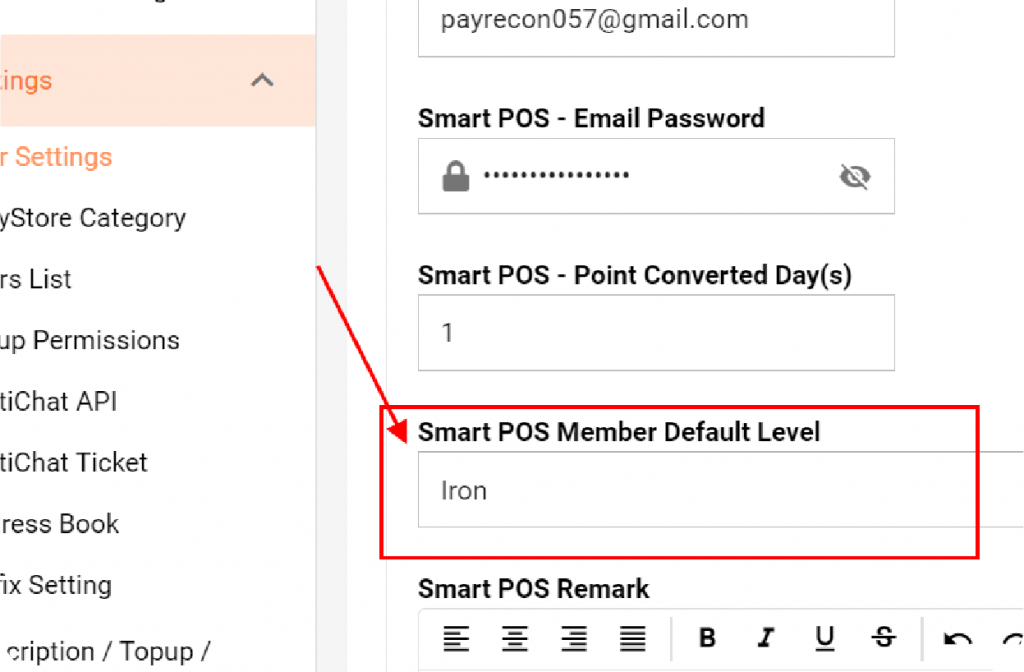
Step 7:
Alternatively, you can designate a default level for all customers upon registration. This can be adjusted in “System Setting” under “User Setting” within the “Setting” section. Check the Smart Pos area and modify the default level accordingly.
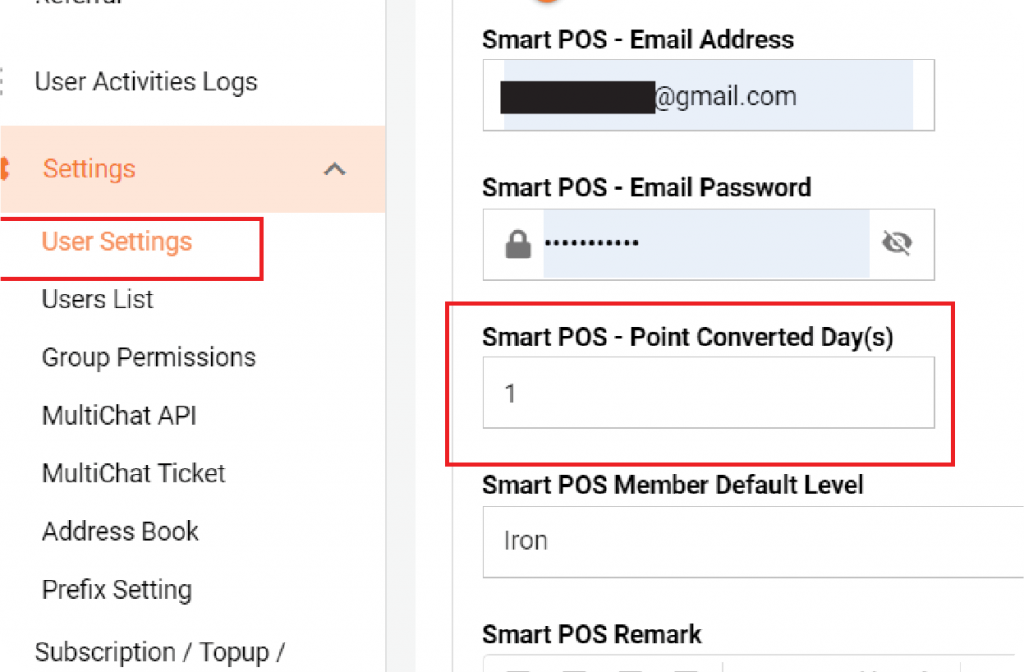
Step 8:
Points are awarded to customers a day after a purchase. Should you prefer customers to use points after a specific duration, this can be adjusted in “System Setting” under “User Setting” within the “Setting” section. Check the Smart Pos area and modify the date accordingly.